DIY life hacks is “Do it yourself” shortcuts or tricks to build, repair, and modify things without aid from expert of professional or even buy an expensive product to solve your problem.
With DIY life hacks, you can solve some of the things by yourself just by using common items that you have around and allow you to save money and time.
We at Life Hack Solution have listed down 10 practical DIY life hacks together with ultimate guidance on how to do it!
DIY Life Hacks #1: Pump Balloon Using Mint & Coke
Do you need to pump a balloon but don’t any pump or lung capacity to blow? With this DIY life hack, all you need is just a mint and coke!
What you need:
- Empty balloon
- Mint
- One big coke bottle
Step 1: Take 2 to 3 mints and put them inside the empty balloon.


Step 2: Attach the empty balloon to the bottle of soda drinks (Preferably: Coke). While attaching the empty balloon to the bottle, make sure you hold the mint from the balloon skin so it won’t fall down.

Step 3. After it successfully attach (make sure it attached to the bottle properly), you can release the mint so it will fall down from the empty balloon to the soda bottle.
Explanation: The mint will release gas from the beverage which creates an eruption that push up the liquid up and out from the bottle. However, because you close all the hole with the empty balloon, all the gas will goes and fill in the empty balloon.


Step 4: Now your balloon will be filled with gas and some portion of the soda liquid. After a while, slowly put back the liquid from the balloon to the bottle (you only want to keep the gas).


Now your balloon is fully filled!
DIY Life Hacks #2: Use Paper Clip as Battery Replacement
Your remote has run out of battery and you only has one battery left? Grab your paper clip now and let’s do some work. We’re gonna show you some magic.
What you need:
- Paper Clip
Step 1: Put one of your battery inside the remote control. Grab one of the paper clip, and straighten it like below:

Step 2: Complete the circuit in your remote control by connecting the looped end of paper clip to the spring at negative terminal and the other end of paper clip to the positive terminal.


After this, close the battery cover and try your remote now. Rate this trick on the comment below!
DIY Life Hacks #3: Use Binder Clip as Cable Catcher
If you like to charge your devices on the table, you’ll understand the annoying part where you need to put back your cable to the floor every time you finished charging.
If you didn’t do anything to hold the cable, it will fall off by itself from the table and damage the cable. The truth is, you can create the cable catcher by yourself to prevent this problem.
What you need:
- Binder Clip
Step 1: Simply attach your binder clip to the table, you can put as much as you want according to your needs.

Step 2: Put the one cable for each binder clip as the cable catcher on your table.

However, there might be a condition where the cable head is too big and can’t fit the clip. Don’t worry, we will show you the trick to solve this:

Step 1: Press in the aluminum part of the binder clip and take it off.


Step 2: Attach the aluminum to the cable.

Step 3: Put back the aluminum part to the binder clip now.


Now your table’s cable catcher is ready!
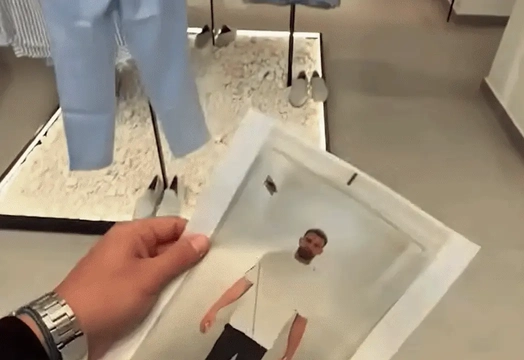
DIY Life Hacks #4: Strengthen Phone Signal With Paper Clip
One of the most annoying thing is when you going to some area that has weak signal. Don’t stressed out so early as we have easy solution for you!
What you need:
- 4 paper clip
- Tape
Step 1: Take 4 paper clip and straighten them out into a straight line.

Step 2: After finished straighten 4 paper clips, take 2 of them and put it on the back of your phone and attach it with tape.


Step 3: Take the other 2 clips and attach them on the top of 2 paper clip that you’ve attached earlier. This is to extend the length of the line. As the result, your phone will receive the strongest signal possible.


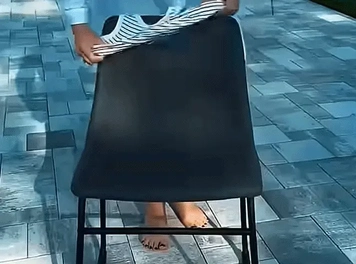
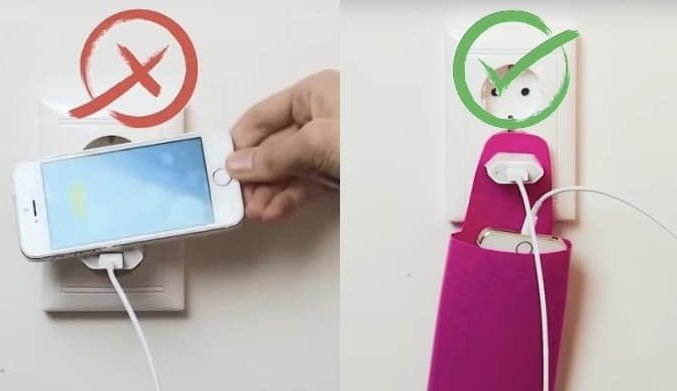
5. Make a DIY Phone Holder for Charging

When hanging out in shopping mall or any other public area, sometimes you need to charge your phone. But there is a problem: you have no idea where to put your phone. As you try to put on top of your head charger, it will fall off. You don’t want to put your phone on the floor either as it contains a lot of bacteria. Don’t worry, we have a DIY life hacks for you!
What you need:
- Unused empty water container
- Marker
- Cutter

Step 1: Draw a line using marker (follow the picture below).
Front part:

Back part:

Step 2: Use cutter to cut the container according to the line you’ve drawn.


Step 3: After cut, you’ve should get the following shape:

Step 4: Grab your head of charger and draw the outliner of your charger shape.

Step 5: Cut the line with your cutter again.

Attach it to the head of your charger while charging, and now you can put your phone inside it!

6. Make Pop Corn Using Pan
If you don’t have any stove or pop corn maker, you can make a pop corn just by using a pan and aluminum oil!
What you need:
- Frying Pan
- 2 Aluminum Foil Paper
- Pop Corn Seed
- Cooking Oil
Step 1: Put one of your aluminum foil paper on the frying pan as the base.

Step 2: Put in your pop corn seed & cooking oil on the aluminum foil base.


Step 3: Take the other aluminum foil paper as the cover. Attach and wrap it accordingly with the base aluminum foil.


Step 4: Now fry the pan and wait until the aluminum foil paper inflate – indicates that the pop corn is cooked.


Your pop corn is ready to serve!
7. Solve Smaller Size Battery Problem

If you accidentally buy wrong battery size (smaller), don’t throw away your battery yet!
What you need:
- A small portion of aluminum foil paper
Step 1: Take a piece of aluminum foil paper and crumb it to a small ball.


Step 2: Fill the gap between the battery and the terminal.


Your device will start to work as the aluminum foil transfer the energy from battery to the terminal.
8. DIY Easy Cable Organizer

Having too many cables indicates messiness. As you don’t want to create an ugly appearance of your table just because of your messy cable, you might start to consider to tidy it up. We have the easiest way for you to make a cable organizer.
What you need:
- Pencil Sharpener
- Plastic Straw
Step 1: Start to work your straw to the sharpener as how you normally sharpen your pencil.


Step 2: Once finished, it should look like below:

Step 3: Grab your cables together and start to tie the cable with the straw.


You don’t need any glue or tape to attach this straw with the cables as it will forced to follow the straw’s shape.
9. Inaccessible Bottle Part Cleaner

When cleaning the stain inside the bottle that shape like this, it’s very hard to clean it. Even if you just put water with soap and shake the bottle, the stain won’t go away. You know that you need to scrub it but you can’t do it due to the bottle shape.
Don’t frustrated yet, as usual Life Hack Solution will provide an amazing and cool solution!
What you need:
- Toothbrush
- Lighter
Step 1: Turn on the lighter and grill the middle of bottom part of the toothbrush.

Step 2: Bend down the edge until it look like below:

Your brush is ready now! Now you can brush the edge that is impossible to access before.


10. Create a Self-Watering Planter

Do you want to have a self-watering pot planter that look like above picture? Surprisingly, you can “do it yourself” if you follow the step-by-step tutorial below.
What you need:
- Acetone
- Empty glass bottle
- Cotton thread
- Foam
- Container with cold water
- Mesh Fabric
- Gas lighter
- Soil
- Plant
Step 1: Grab your empty glass bottle and start to tie a cotton thread.

Step 2: Make sure the end position of the cotton thread is as per following picture.

Step 3: Pour acetone on the cotton thread.

Step 4: Get ready a box contain of cold water, and grab your bottle on top of it.

Step 5: Lit the cotton thread with gas lighter and wait until the fire off by itself.


Step 6: Once there is no more flame, put down the bottle to the cold water. The bottle will then automatically cut into two as it reaction to the cold water.


Step 7: Wipe & clean the burnt mark with foam.

Step 8: Now prepare one mesh fabric and one cotton thread. Then, tie one of the tail of the cotton thread forming a knot like picture below.


Step 9: Put the other tail (not the knot) to the middle of mesh fabric and pull it until the end.


Step 10: Grab your bottle and place the top part into the bottom part of the bottle such as picture below.

Step 11: Pour water into the bottle, the maximum water level you can put is until it reached the edge of reversed bottle part.

Step 12: After put the water, place the mesh fabric and make sure the tail of the cotton thread is touching the water.

Step 13: Put soil on your mesh fabric.

Step 14: Put your plant now.

Your self-watering planter is ready now!